Junkers Ju 87A-1 "Stuka"
| Kit: | MPM (Ju 87A-1) + Italeri (Ju 87B2/R2), 1/72nd; MPM kit bought in 2013 for $7, Italeri kit bought in 2009 for $11.77; model finished on 2023-04-23 |
|---|---|
| Aircraft: | "D-IAEU" (12th pre-production aircraft), 1/StG 2 "Immelmann", Luftwaffe, 1937. |
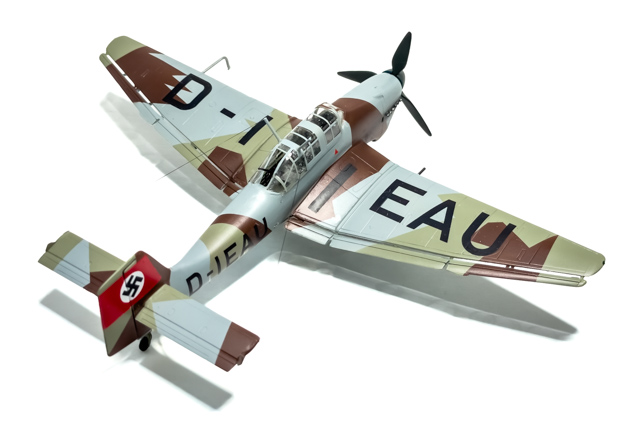
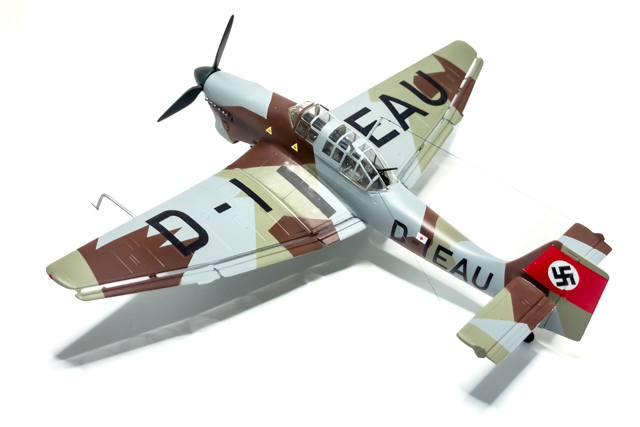
The infamous "Stuka" dive bomber needs no introduction, but I feel everyone always builds models of the B, D, and G variants, and you seldom see the early A variant. My model depicts the 12th pre-production aircraft during its service trials with 1/StG 2 in 1937. Note that the aircraft carries German class B1 civilian registration; this were replaced with Luftwaffe markings and tactical codes when the aircraft was sent to a front-line unit. Many of the early Stukas were experimented with and served with Legion Condor in the Spanish Civil War.


Construction Notes
Some years ago I acquired a second-hand MPM Ju 87 Anton kit. It is one of the older MPM kits (dates back to 1997), and is in many ways rather crude: it lacks detail, has lots of flash, etc. I very much wanted to build an early Stuka, so I decided to combine the MPM kit (only the parts I absolutely needed) with parts from the Italeri Ju 87B. That means that the fuselage, the wheel "spats", and the canopy had to come from the MPM kit, but the wings, the horizontal tail, cockpit interior, wheels, etc., could be scavenged from the Italeri kit. In many ways this is an easier conversion than the one Gerald Scarborough describes in his book [1]. I suppose I could have used the newer Special Hobby kit, but my recent experience with Special Hobby kits has not been that good, and I did not have that kit handy anyway. Besides, I like putting in some work and making good models from old kits. Good examples of this approach are my Vampire and X-15.
It took a lot of work to mate the MPM wings with the Italeri fuselage. Most notably, I had to "build up" the ventral fuselage between the wings a bit. I also had to build the back side of the radiator, since MPM does not offer anything there, just empty space. Getting the Italeri interior into the MPM fuselage was not difficult, and only required the rear machine gun mount to be added. I also added some structure to the sides of the cockpit. The MPM vacuform canopy was quite a bit of trouble. I cut open the rear for the machine gun, and also replaced the windshield with a part from the Italeri kit. Finally, I drilled out the holes for the exhausts and used suitable Albion Alloys' aluminum tubing for the exhaust stacks. This was actually easier than I thought, since aluminum is quite easy to work with, so getting a straight line (looking from above) was only a matter of sanding the ends of the tubes.
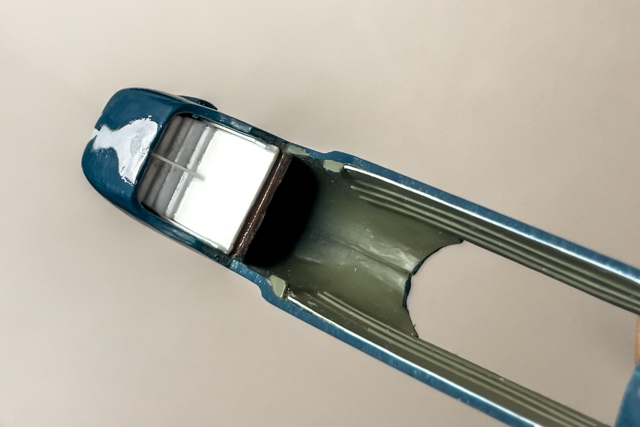
MPM fuselage with cockpit lined with 5 thou styrene sheet
Scratch-built backside of the radiator.
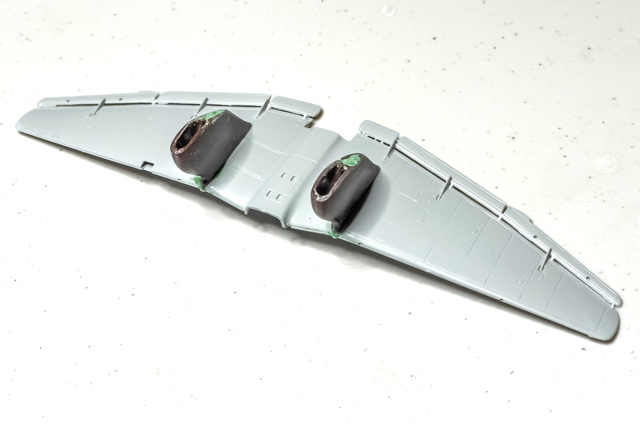
MPM wheel spats mated with the Italeri wing.
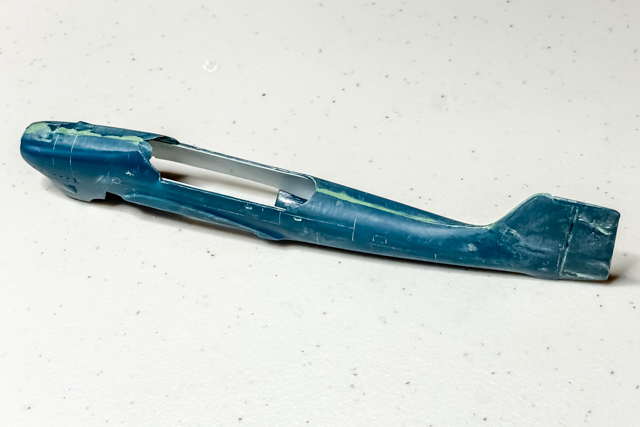
Test-fitting the wing/fuselage fit.
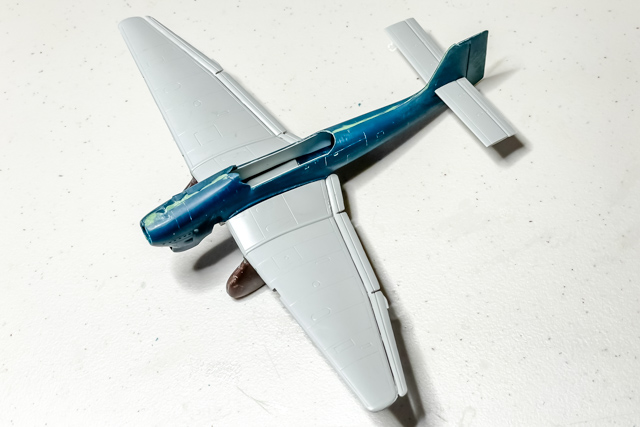
Wing mating finalized. Note the drilled-out exhausts.
MPM vacuform canopy installed. The windshield is from the Italeri kit.
Final detailing encompassed Italeri main wheels and tail wheel, the Italeri bomb and bomb rack (caveat: I am not 100% certain the B "crutch" or trapeze is exactly similar to the one used on the A model), Italeri machine gun, MPM pitot tube (I drilled a hole in the wing for that), and scratch-building the antennae. I drilled holes in the canopy, sanded some Evergreen styrene rod down so that the cross-section is more of an oval, and super-glued them in place. The antenna wires are EZ-Line, and the insulators are just little globs of white glue. The torque placed on the antenna mast attachments by the wires is minimal, I did not notice any bending or warping.
The aircraft sports the pre-war 61/62/63/65 color scheme. These are the colors I used:
| RLM 61 dunkelbraun | Tamiya XF-10 Flat Brown | One might argue this is just a bit too light, but I think good for this scale |
| RLM 62 grün | Mr.Color 60 RLM 02 | Again, perhaps a bit light, but looks good in this scale |
| RLM 63 hellgrau | Mr.Color #335 Medium Sea Gray | I think this is spot on |
| RLM 65 hellblau | Mr.Color #115 RLM 65 | |
| RLM 23 rot | Tamiya XF-7 Flat Red | For the tail |
| RLM 70 schwarzgrün | Mr.Color #18 RLM 70 | For the propeller |
The red tail banner was masked and initially sprayed white. I then masked the circle, and sprayed red. The swastika is a decal of my own making.
I made my own decals (except for some of the little fuel/oil triangles, which came from scraps of old decals sheets). I scanned the correct alphabet from the Kookaburra guide [5] and used the results to make artwork for the registration letters. To print the decals, I used a color laser printer and SunnyScopa clear waterslide decal paper (see the description in the write-up of my Avro 707A). For the little number below the horizontal tail, I used the Ghost White Toner cartridge in my printer in place of the black toner; the results of printing white decals are so far amazingly good.
References Used
The Stuka is generally extremely well documented. Here I am listing just the references I used that are specific to the A-model.
- Ju 87 Stuka (Robertson & Scarborough); Classic Aircraft, Their history and how to model them 5; Patrick Stephens Limited 1977
- Junkers Ju 87A (Dressel & Griehl); Luftwaffe Profile Series 5; Schiffer 1996
- Junkers Ju 87A & B (Smith); Profile Aircraft 76; Profile Publications
- Luftwaffe Camouflage & Markings 1935-1945, vol 1 (Merrick); Kookaburra Technical Publications 1973
- The Modeller's Luftwaffe Painting Guide (Smith et al); Kookaburra Technical Publications 1979
Pictures of the aircraft the model depicts appear in [2, p.21] and [4, p.46].
More Information
- This model's entry at the Finnish scale model site pienoismallit.net
- Scalemates entries for the MPM kit and the Italeri kit

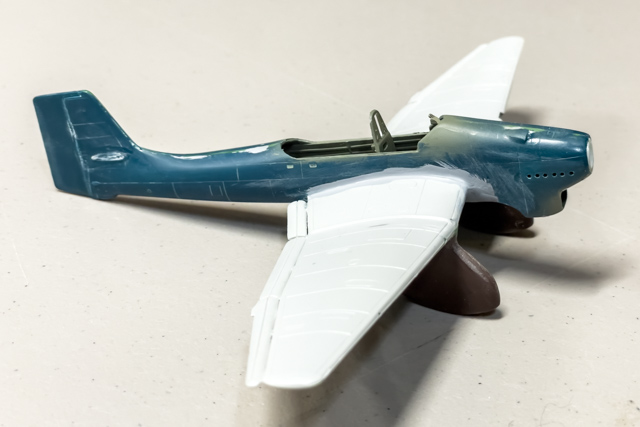
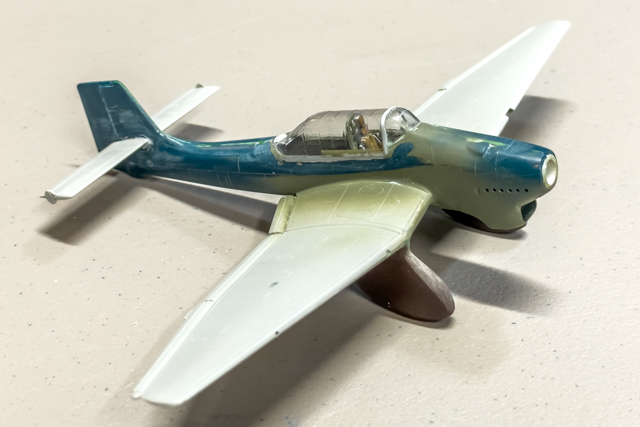
Camouflage painting completed.